
Welcome to our DashSkin™ installation guide! In this post, we’ll walk you through the process of installing our DashSkin™ on 1997-2002 Camaro and Firebird models. Whether you're tackling a cracked dash or just looking to upgrade your interior, this guide will help you achieve a professional-looking result. Let’s dive in!
1. Verify Your DashSkin™ Color
Before starting the installation, it’s crucial to ensure you have the correct DashSkin™ color for your vehicle.
- For models from 1997-1999: Choose the Graphite color.
- For models from 2000-2002: Opt for the Black color.
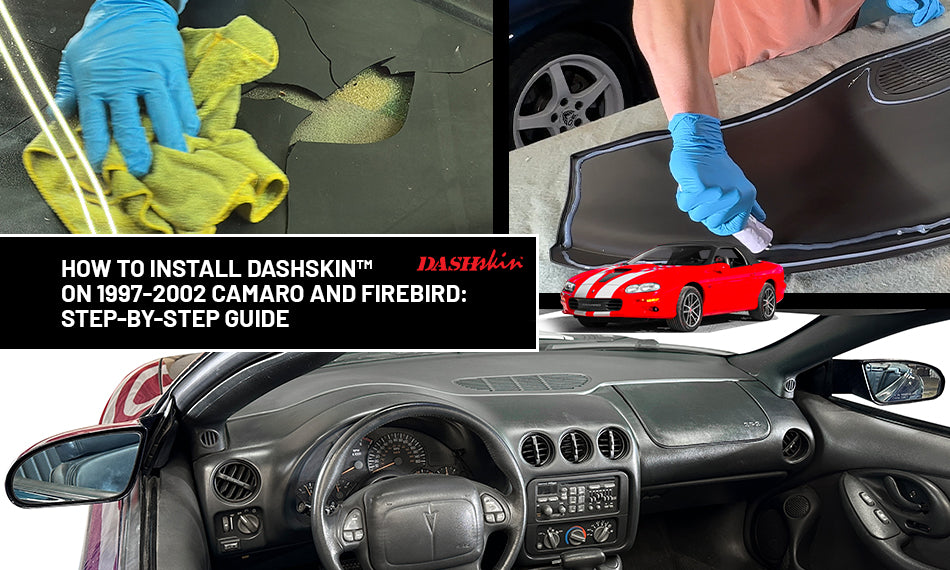
2. Clean and Prep Your Dash
A clean surface is essential for a successful installation. Follow these steps:
-
Clean the Original Dash: Use a commercial-grade degreaser like Zip Purple Power or Simple Green to thoroughly clean your original dashboard. This removes any grease, dirt, or residues that could interfere with the adhesion.
-
Dry Fit the DashSkin™: Place the DashSkin™ over your existing dash to check for proper alignment and fit. This step allows you to plan where weights will need to be applied during the installation process.
3. Prepare Cracks and Holes
Address any cracks or holes in your original dash before applying the DashSkin™.
-
Apply Silicone to Cracks: For existing cracks, apply silicone to fill them. This step helps create a smooth surface for the DashSkin™ to adhere to.
-
Outline Holes: Similarly, use silicone to outline any holes to ensure they are sealed properly.
4. Apply Glue
- Glue Application: Apply glue to the underside of the DashSkin™ following the pattern illustrated in your installation guide. This ensures the DashSkin™ will adhere securely to the original dash.
5. Install the DashSkin™
-
Slide the Cover into Place: Start by carefully sliding the driver’s side of the DashSkin™ into position. Once that side is in place, gently bend or taco the passenger side to navigate it past the A-pillar.
-
Wedge Cardboard: Since weights cannot be placed near the windshield, cut some pieces of cardboard and wedge them between the dash and the windshield. This helps ensure even adhesion.
-
Apply Weights: Distribute weights evenly across the entire dashboard to hold the DashSkin™ in place. You can use sandbags, reams of printer paper, or even phone books.
6. Finalize the Installation
-
Curing Time: Allow the DashSkin™ to cure for 6-8 hours. During this time, the adhesive will set, ensuring a secure and lasting bond.
-
Remove Weights: After the curing period, carefully remove the weights and inspect your newly installed DashSkin™.
7. Enjoy Your Upgraded Dashboard
Congratulations! With your DashSkin™ securely installed, you can now enjoy a refreshed and sleek dashboard.