
Introduction
Welcome to our DashSkin™ installation guide! If you're dealing with a cracked or damaged dashboard in your GM or Chevy truck or SUV from 1997 to 2000, you've come to the right place. This video walkthrough will guide you through each step of the process to ensure a smooth installation.
1. Locating Your Trim Code
Before you start, it’s crucial to identify the correct trim color for your vehicle. Locate the SPID (Service Parts Identification) label inside your glove box. Use this information to match your trim code with our Trim Code Guide to ensure you order the correct color for a perfect match.
2. Removing the Front Bezel
To begin the installation, you need to remove the front bezel. Use a plastic putty knife to gently pry the bezel away from the dash. You don’t need to completely remove it; just enough to access the area behind it.
3. Removing the Fuse Panel Cover
Next, take off the fuse panel cover. This step will give you clearer access to the dashboard and ensure a more precise installation.
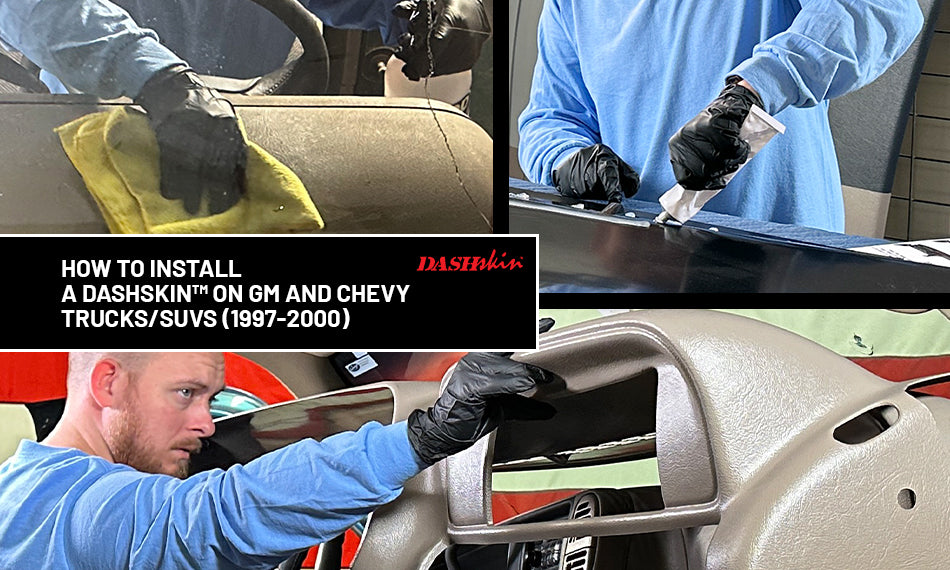
4. Cleaning & Prepping Your Dash
Thoroughly clean your original dashboard using a commercial-grade degreaser like Zep Purple. This step is essential for ensuring that the DashSkin™ adheres properly. After cleaning, let the surface dry completely.
5. Dry Fitting the DashSkin™
Before applying any adhesive, place the DashSkin™ over your existing dash to check for alignment and fitment. This step allows you to plan where weights will need to be applied for optimal adhesion.
6. Applying Adhesive
Apply silicone adhesive to the underside of the DashSkin™ following the pattern illustrated in your install guide. Don’t forget to apply silicone to any existing cracks or holes on your original dashboard to ensure a seamless fit.
7. Installing the DashSkin™
Carefully place the DashSkin™ over your original dash, ensuring that all seams and edges line up perfectly. Before securing it in place, double-check the alignment to avoid any issues.
8. Applying Weights
To secure the DashSkin™, apply weights evenly across the entire surface. You can use sandbags, books, or even rolls of printer paper. For areas near the windshield, roll up some rags and wedge them between the windshield and the dash to keep the DashSkin™ pressed firmly.
9. Adding Prop Rods
For the front surfaces, use a telescoping prop rod or a piece of PVC or wood cut to length to apply additional pressure. This ensures a tight bond and smooth finish.
10. Final Touches
Once everything is in place, remove any excess adhesive and check that all areas are firmly secured. Allow the adhesive at least 6 HOURS to cure before removing your weights. Drier environments (low relative humidity) require longer curing time. If possible, leave the vehicle overnight for best results.